


What you’ll need:
1 - 1.5” x 3” piece of fabric
1 - 1.5” x 3” piece of medium-weight fusible webbing
1 - 1.5” x 3” piece of wool felt
1 60mm (2”) metal snap clip
A quick drying, strong glue such as Quick Grip or E6000
Fray Check
1 pre-made mini hair bow or other embellishment
Scissors
Household Iron
Cuttlebug Die Cutting Machine (or other machine that adapts for Cuttlebug dies)
Cuttlebug Build-A-Flower #9919085 Die found here.
(if you don’t have a die cutting, you may also hand cut your materials using the template provided here)


A Cuttlebug Die Cutting Machine and the Build-A-Flower die (not shown) are both handy to have for this project. If you don’t have one, you can still make these clips by printing a copy of the template and tracing it out onto your fabric and felt. For this tutorial, I’ll be using the scallop-edged flower petal shape as my clip cover, but you can use whichever one you like.

After gathering your supplies, iron the fusible webbing onto the back of your fabric piece using a medium/wool setting.

Run your fusible webbing-backed fabric and wool felt pieces through your die cutting machine or hand cut using the template.

Adding a tiny bit of Fray Check along the edges of the fabric piece will slow any fraying.

While folding your wool felt piece in half vertically, cut a very small slit through the center about ½” from the wider end.

Insert the open end of your snap clip through the slit.

Add glue to the top of the snap clip.

It helps to use a toothpick to smooth the glue all over, paying close attention in getting close to the edges of the felt, but not so thickly that the glue seeps out when the fabric is added on top in the next step.

Align your fabric piece over the glue and press around the edges firmly to adhere in place. Let your clippie dry for about 20 minutes or so and then glue your mini bow or whatever embellishment you prefer to the larger end of the clip.
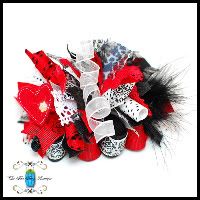
In case you were wondering, the flower clippie was made using these dies found here. A small button was hand sewn to the smallest flower, then all flower layers were glued together and then finally onto the clippie.
 You are done! Wasn’t that fun and easy? Now you can custom make these for your own daughters and family members. Additional ideas/uses:
Party favors
Stocking stuffers
Teacher gifts
Craft project for tweens/teens
Gift exchanges
Please contact us at our website www.bluepumpkindesigns.com if you would like clippies like these, but would rather not make them yourself. We love to do custom orders if you don’t see what you need there!
We hope you enjoyed this tutorial. Use the technique you just learned to create items and do with them what you wish, but PLEASE do not copy or take our actual pictures or tutorial text in any way, shape or form without our permission. This does not at all include linking back to us from your own blog or website. In fact, if you like today’s crafty tip, we totally appreciate you spreading the word!